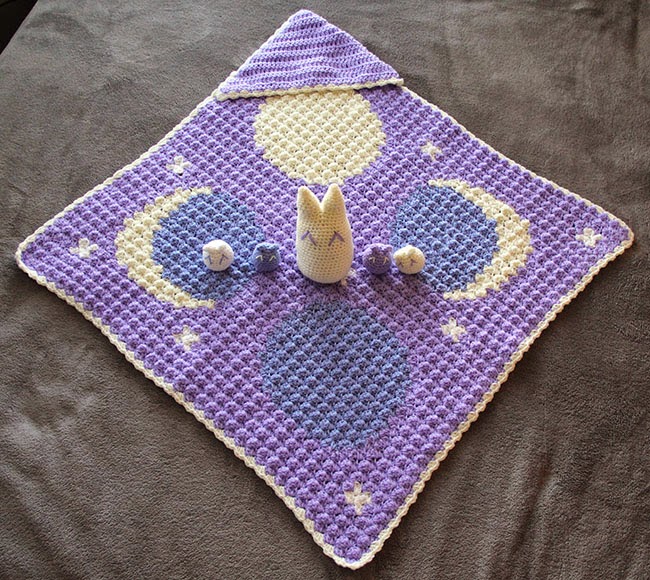
A granny square blanket with a jester hat
One of my cousins had an adorable baby boy, who I neglected to make a blanket for for so long he turned into a toddler. So a toddler blanket it is. When I asked what they would like to go with the blanket, they took a look through my Pinterest boards and landed on a jester hat. I was expecting a stuffed animal, but jester hat will do. Hopefully he'll be able to use it before he grows out of it. The weather is getting warmer after all.
 |
| Granny square blanket with jester hat. |
Main Info
Granny Square Blanket
- Size: 44" by 38"
- Time: 30 hours
- Yarn: Caron One Pound Yarn
- Soft Sage
- Azure
- Soft Grey Mix
- Pattern
- Granny Squares: Standard square with 6 rows
- Square joining stitch: Pinterest pin / Blog post
- Edging: Pinterest pin / Blog post
Jester Hat
- Size: 13.5" tall from unfolded bottom to tip of one point, 39cm around
- Time: 11.5 hours
- Yarn: Same
- Pattern: Pinterest pin / Blog post
Thoughts from the process
Blanket
The blanket uses 5 by 6 granny square patches. Each granny square has six rows, two of each color. I changed the order of the colors to get three kinds of granny square to make the below pattern.
 |
| Fully picture of toddler blanket. |
I used a flat slip stitch to join the squares together. I like how it turned out, though there is a definite right and wrong side to this blanket by both the square and the joining stitch.
After joining the squares together I added a tiny scalloped crochet edging, seen at the bottom of the linked blog post.
 |
| Close up of tiny scalloped crochet edging. |
While working on the edging, I also made sure to have a scallop at each corner.
 |
| Scallop edging at corner of blanket. |
Now that I can see the blanket in it's entirety from far away with a picture, I'm glad I had the husband help me with the color choices and order. I attribute to him the fact the pattern came out so well.
Funny enough this blanket was originally intended to be made with scrap yarn, but I didn't have enough so I ended up buying new skeins of all three colors! So I'll be looking for another project to use this yarn with.
Stiff yarn is good and bad
And as my final comment, this yarn is stiff, which resulted in two things.
One my hands started to hurt if I stitched too much. I should probably use a bigger hook next time.
Second the stiffness is great for beginners because it's easier to make consistent sized loops. Discovering this was a happy accident. I was teaching a friend to crochet and the black yarn she had was terrible for seeing what she was doing. So I grabbed the nearest ball of yarn that wasn't such a dark color and it happened to be this yarn.
Jester Hat
This jester hat is adorable and the pattern surprised me. I was expecting to have to crochet multiple pieces and then stitch it all together. Actually it's one solid piece that is then sewn closed.
 |
| Jester Hat |
Carrying up yarn = fat seam
The pattern had me carry the unused yarn up as I did the stripes, which resulted in a really fat seam at the back of the hat (not pictured). If I make this again think I'd consider not doing that and simply sewing in my yarn ends for the sake of having a bit less of a fat seam. And perhaps the ends could be used to join the hat together, resulting in a nice stripe without too much interruption. Something to think about.
Making wearable crochet, means always always always check the gauge
I had to undo the beginning rows for this hat a couple times because I rarely crochet things that requires being careful with gauge (i.e. blankets and stuffed animals). So unsurprisingly I was a bit relaxed about how close the size of the hat was to what it needed to be. This meant I didn't stretch the beginning rows as far as they could go and measure from that. However due to the yarn's stiffness the more rows I crocheted the more it stretched and firmed up, resulting in a hat that would have been way to big. Lesson learned I guess.

Comments
Post a Comment